Installing OpenVPN Clients
This document shows how to install OpenVPN clients on user devices when using RansNet Gateway as a VPN server. For example, refer to Cloud SD-WAN — Software VPN Client where you may want users to connect to your network via VPN instead of port forwarding.
Step 1: Configure VPN on RansNet Gateway
On the gateway device, navigate to Device Settings → SD-WAN → VPN and create a VPN instance with client profiles.
Step 1a: Create a new VPN instance and add a client profile.
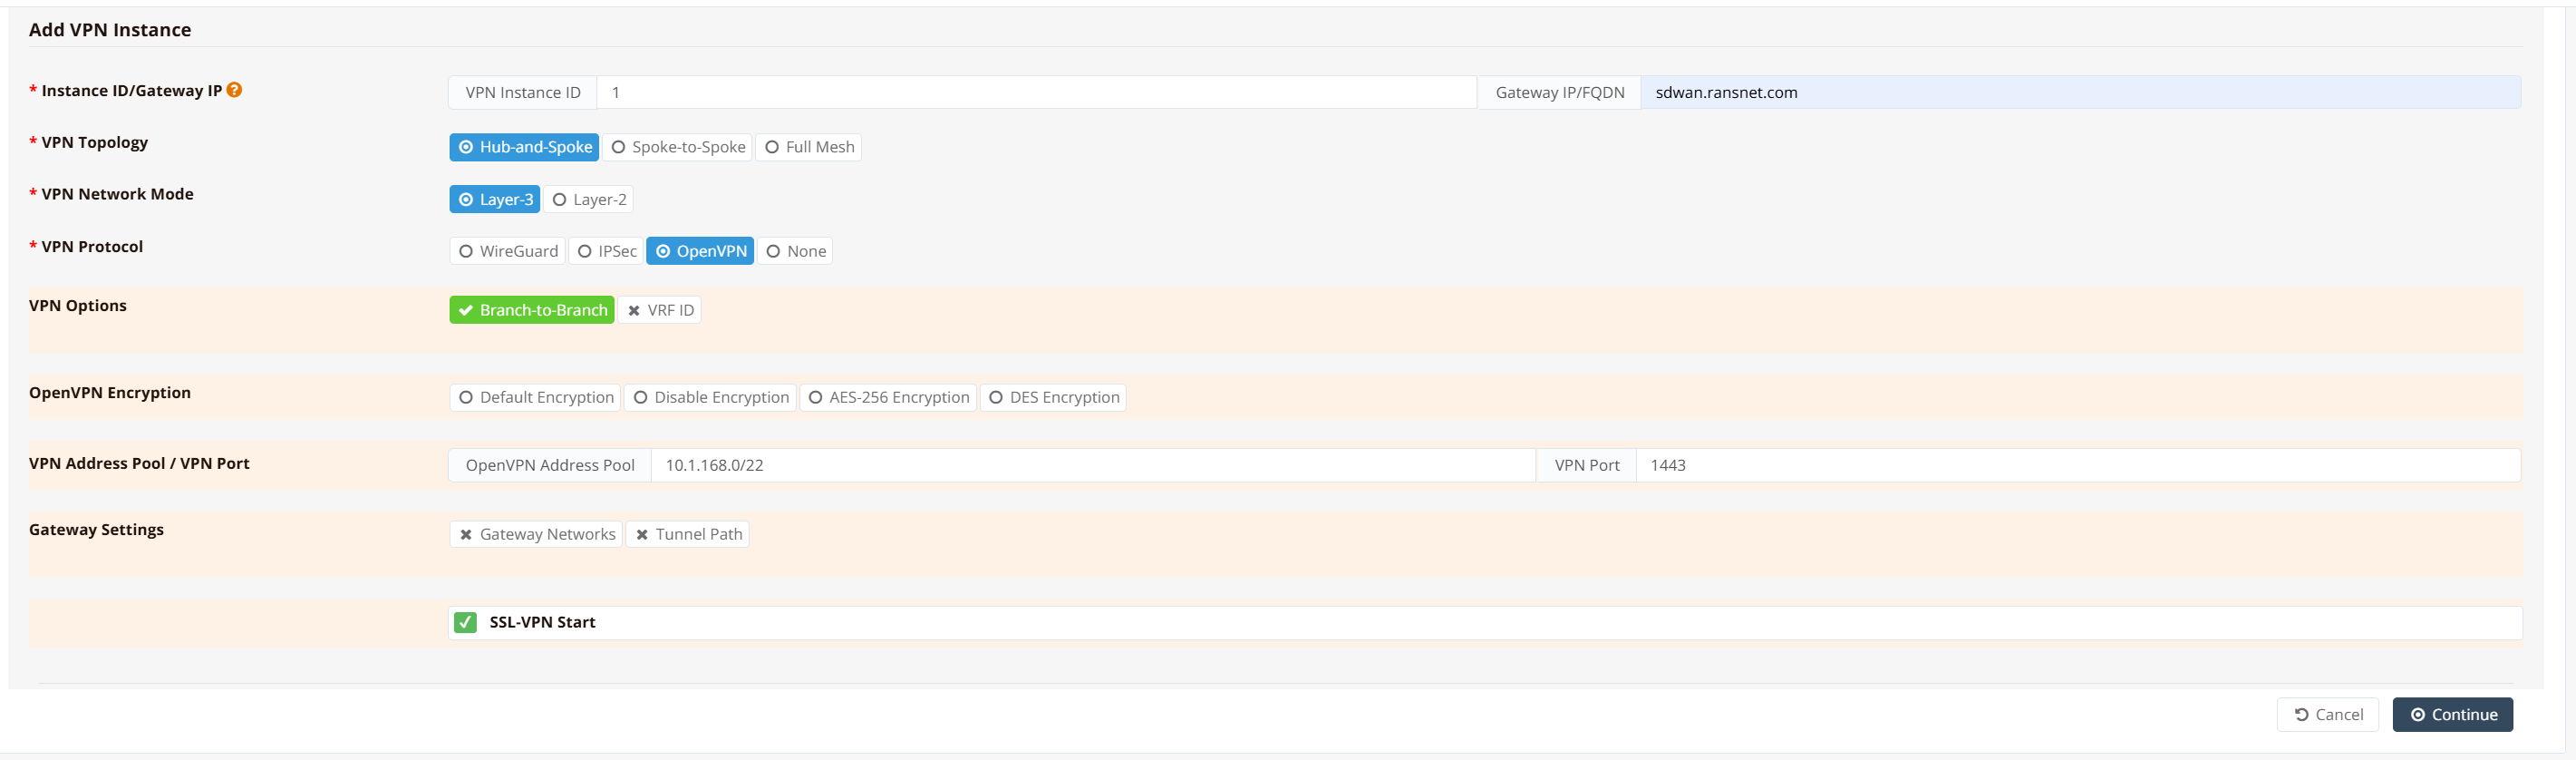
Step 1b: Create a client profile and enter a descriptive name (e.g., "Remote-Users" or "Branch-Office").

Step 1c: After saving and applying the configuration, download the profile to your local PC.

Step 1d: Open the downloaded .ovpn file in a text editor and remove or comment out the following two lines:
These lines are specific to router operation and should not be included in software client profiles.
Step 1e: Save the edited .ovpn file and distribute it to users securely.
Step 2: Install OpenVPN on User Devices
Android Mobile Device
- Download OpenVPN for Android from the Google Play Store
- Open the app
- Select FILE and locate the
.ovpnprofile you downloaded - Click IMPORT to add the profile

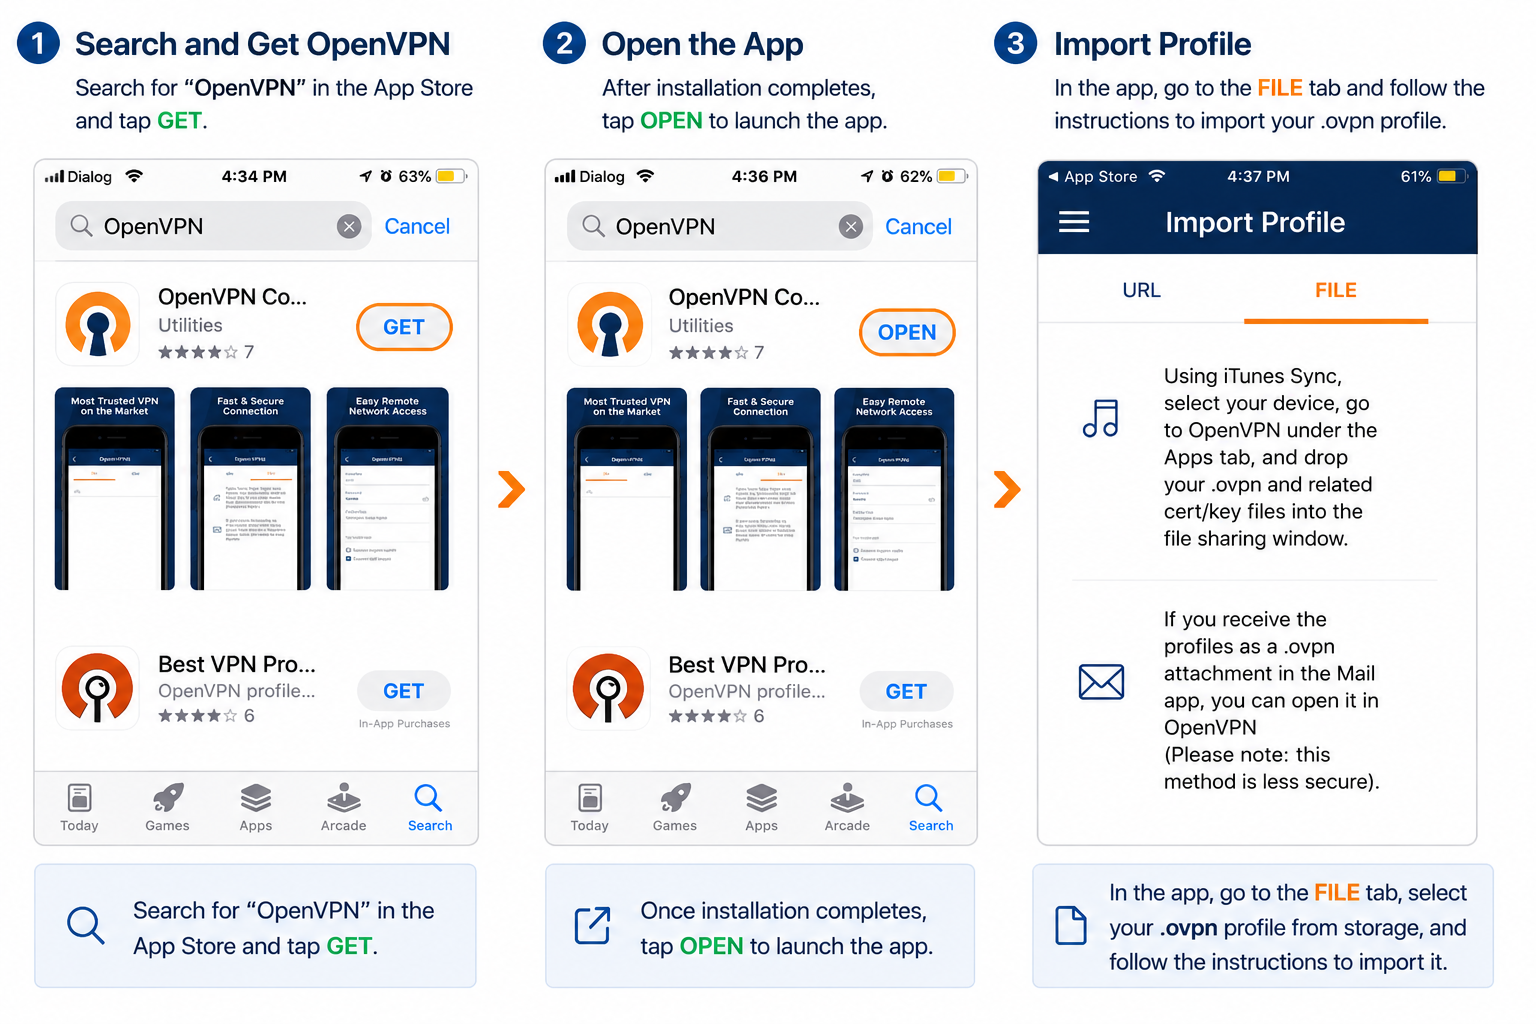
iOS Mobile Device
- Download OpenVPN for iOS from the Apple App Store
- Open the app
- Locate and open the
.ovpnfile; it will automatically open in the OpenVPN app - Click IMPORT to add the profile
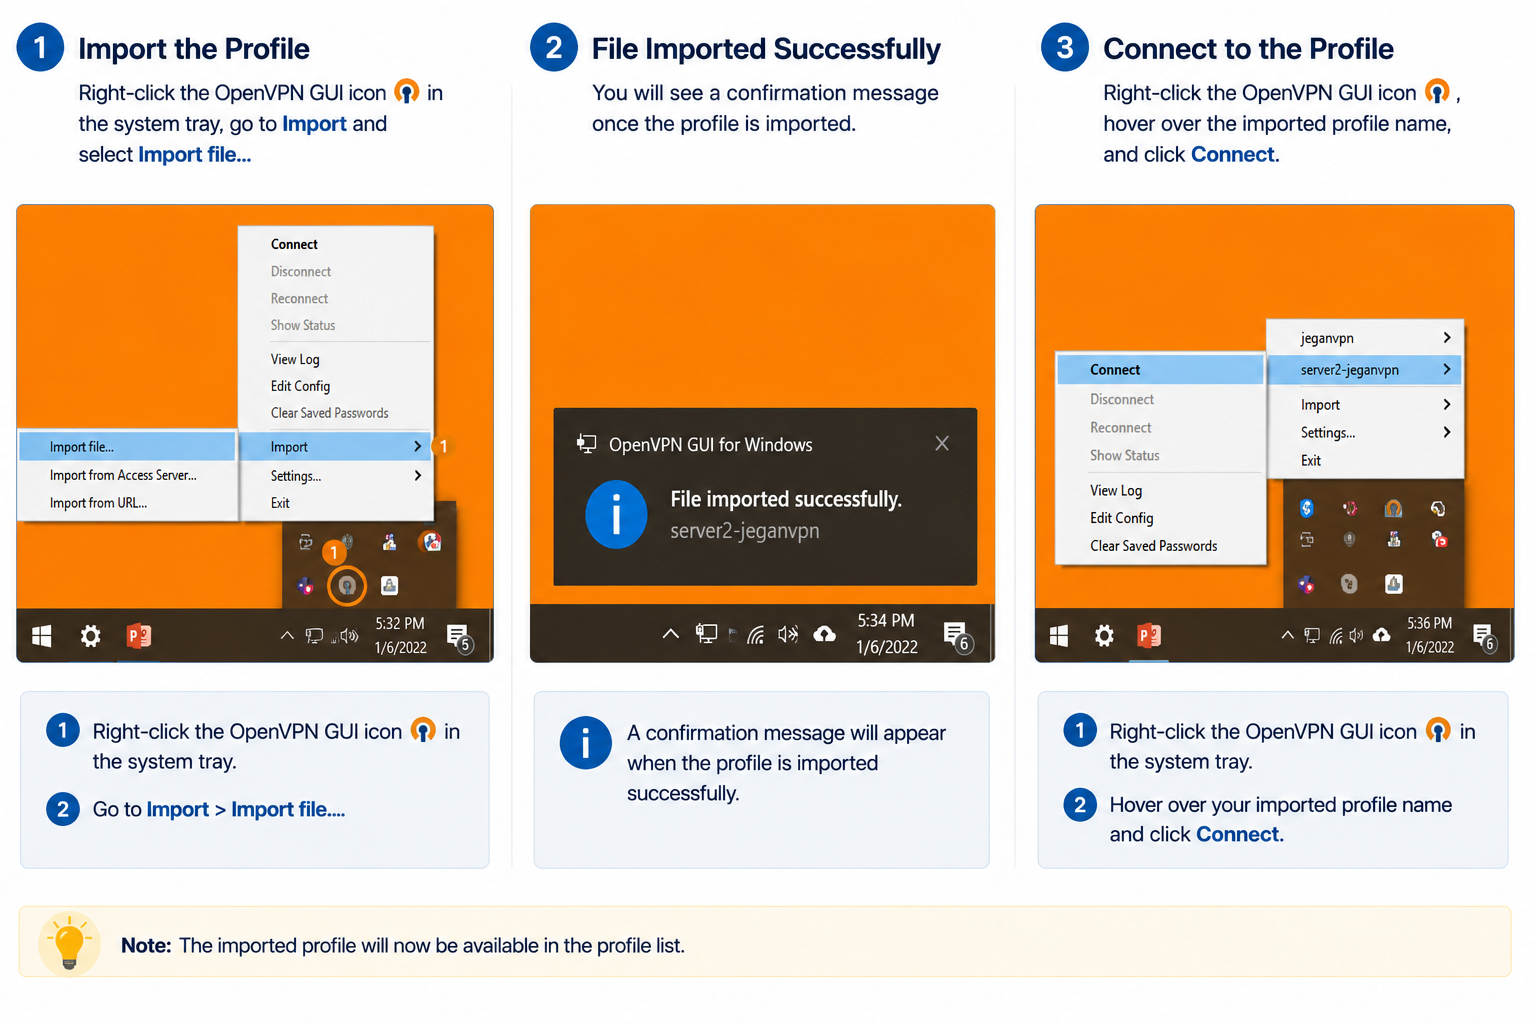
Windows Device
- Download OpenVPN from openvpn.net/community-downloads
- Download the MSI installer appropriate for your Windows version (32-bit or 64-bit)
- Install the application
- Right-click the OpenVPN icon in the system tray (Windows Taskbar) and select Import File
- Browse to the
.ovpnprofile you downloaded - To connect, click Connect in the OpenVPN app and select the imported profile name